Wednesday, 15 November 2017

WEEK 15 (FYP 2)


WEEK 15 

                        Activity : Industry Day


       Salam viewers....today is Wednesday on 15th November where the Industry Day were take place. The final week for this project, as I remind you all..Development of Home Automation System (HAS)  Using Android For Smartphone Application.

Gonna do some preparation in this week. Preparation in terms of Poster in Technical and Marketing, Slide Presentation, a complete prototype project, a short-video of project (in case for some error), and the last one prepare for short-demo. Below is my poster on technical and marketing.


2 lecturer will be the assessor to assess every student in this industry day. The assessor for this FYP 2 is same as like the previous semester FYP 1. Throughout the presentation, the presentation should be around 15 to 20 minutes. Sorry for the picture during the presentation. There is some error just happen on my smartphone when I try to upload it....But dont worry viewers..below is some short-video for my final year project.


Saturday, 21 October 2017

WEEK 11 (FYP 2)


WEEK 11


                 Activity: 4th Briefing (Abstract, Poster and Presentation )


       Salam viewers...this week where the briefing was conducted in TTL 1 and as usual always happened  on the evening. All students FYP 2 were compulsory in attendance. The speaker for this workshop is Ms. Najihah Saleh (Electrical Technology Section)

       DATE: 20TH OCTOBER 2017
       VENUE: TTL 1
       TIME: 3PM - 5PM  


       In this briefing, the FYP committees have been briefing to us about:

HOW TO WRITE ABSTRACT IN THESIS WRITING, PREPARATION FOR POSTER AND SKILLS FOR PRESENTATION


ABSTRACT WRITING 
  • One(1)page
  • One(1)paragraph
  • No point form for the sentences
  • The sentences must be written in statement form
  • Summary review of; -objectives, scope and limitation, methodology, and results
POSTER PRESENTATION

  • Must be in PPT format and for advance is using the adobe software
  • The sample can be seen at the fyp website..
Layout of the Poster


PRESENTATION SKILLS
  • Don't panic if make a mistake in presenting(acknowledge it, laugh and move on)
  • Don't read (understands & paraphrases-it keeps people on their toes)
  • Practice! Practice!!(practice make perfect)
  • Summarize & keep it short!!(say everything that needs to be said in as few words as possible)
  • Use a mirror!!(increasing the charismatics skills)
  • Vary the pace and pitch!!(too much of any one thing in boring and use the voice effectively)
  • Live with the fear(be relax and learn how to harness it)
  • The eyes have it!!(maintain good eye contact with the assessor & smile ☺☺☺☺
FOR THE PROJECT PROGRESS FOR THIS WEEK, I TRIED TO COMBINE ALL THE EXPERIMENT THAT I DO BY WEEKS...SO BE WAIT FOR THE FOLLOW UP THE PROJECT PROGRESS...THANK YOU

☺ ☺ ☺ ☺ ☺ ☺

Saturday, 7 October 2017

WEEK 9 (FYP 2)


WEEK 9


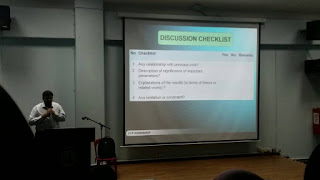
                 Activity: 3rd Briefing ( Result & Discussion, and Conclusion )


                In this week, the briefing was conducted in TTL 1 and as usual, the attendance for all FYP 2 student is compulsory. The speaker is Dr. Fadi 

                 DATE: 4th OCTOBER 2017
       VENUE: TTL 1
       TIME: 3PM - 5PM


 In this briefing, the FYP committees have been brief us about:

 HOW TO WRITE  CHAPTER 4 AND CHAPTER 5 IN THESIS WRITING
  • What the examiners are looking for?
  • Result checklist.
  • Discussion Checklist.
  • Expected from conclusion.
  • Recommendation after the project.


☺☺☺☺☺☺☺☺

Saturday, 23 September 2017

WEEK 8 (FYP 2)


WEEK 8

                   Activity: LM35 Interfacing With Arduino...How it Work?


                  Today blog I will explain about the LM35 interfacing with the Arduino. Learning something new is quite interesting okay...When talking about LM35 that's means this component is related with the temperature sensor. So below is the LM35 picture. For your information, this is the 4th Experiment that I do for my FYP Project is Development of Home Automation System Using Android with Smartphones Application.


LM35 Temperature Sensor

LM35 SIMPLE INTRODUCTION
  • Having an analog output voltage proportional to the temperature is the LM35.
  • Output analog voltage can be converted to digital via the ADC
  • No any external calibration circuitry and provide output voltage in Celsius.
  • When temperature is increases, then the output voltage also increases and the sensitivity of LM35 is up to 10mV/degree Celsius.
  • The temperature ranging from -55 to 150 Celsius with 3 terminal sensor is used.
  • One of the advantages is the temperature output of LM35 is more precise than the thermistor output. As you can see the pin description at above. 

PIN DESCRIPTION


  • GND: Ground
  • VCC: Supply Voltage from (3.3V - 30V)
  • OUT: Gives analog output voltage to proportional to the temperature (in Celsius)
INTERFACING DIAGRAM

Interfacing LM35 with Arduino Nodemcu

After connect the power supply on Nodemcu, then upload the coding of LM35 and the serial monitor will displaying all the measuring og surrounding. Based on the above picture, the Arduino UNO has been replace to the Nodemcu which is change it to the small component and the interesting is this Nodemcu is completely with the Wi-Fi.


Coding From Temperature Measurement

Based on the picture coding above, you can see the arrow. Both arrow is the 'auth token' (can get from the email) and the 'ssid' and 'password'. Need to fill all of this instead of coding to run this experiment.


Result from Blynk Apps

Refer to the picture above, is the result from Android Application "BLYNK".  As you can see the reading show is the ADC Value. Here the LM35 output is given to analog pin A0 of Nodemcu.


Coding LM35

Based on the Picture above, is the coding to get LM35 data via the blynk apps. For this case, I will prove the output on BLYNK apps is correct with this calculation.

CASE 1: 

       resolution = Vref / 1024
where; 
       Vref = 3.3V 
       = 3.3V / 1024 
       temperature = (analog voltage * resolution) * 100 
where; 
       = (89 * 0.003222) * 100  
       = 0.2868 * 100  
       = 28.68 Celsius
       
Based on the calculation, the value in Celsius show is 28.68 and the serial monitor show the reading is 28 Celsius. meaning that, the value from serial monitor is more precise than the value of calculation.

UNTIL THEN...

THAT'S ALL FOR THIS WEEK..WAIT MY ANOTHER BLOG PROGRESS FOR MY FYP PROJECT. ASSALAMUALAIKUM...
       
☺ ☺ ☺ ☺ ☺


Saturday, 16 September 2017

WEEK 7 (FYP 2)


WEEK 7

            Activity:  Servo Motor Interfacing With Arduino UNO....How It Work?


Movement of object can be controlled by controlling motor movement. Normally in robotics projects, servo motor control mechanism is very useful controlling position robotics. In this week's blog..I write and testing about servo motor control using Arduino UNO. Keep read my blog and I will explain more detail about the servo motor.:D:D


SERVO MOTOR?


SG-90 (Servo motor for motorized curtain)                      MG90S (Servo motor for open/close door)

Specification connection


Because of the name is motor...so that the servo motor in the way to control the position of objects. It is easily to control the physical movement of any object because due to the easily position controlled feature. Servo motor cannot move in direct position because it is rotate along in angle range which is 0 to 90 degree, 0 to 180 degree, and also 0 to 360 degree. Servo motor have many apply in robotics project as well.  Because the feature, servo motor is very easy with the connection of Arduino or any others micro-controller in order to built some project as my final year project which is Development of Home Automation System using Android with Smartphone/Mobile Application.


 Running servo motor to control door

Running servo motor to motorized curtain


Saturday, 9 September 2017

WEEK 6 (FYP 2)


WEEK 6

                Activity: 2nd Briefing (Introduction, Literature Review, and Methodology)


              In this week, the briefing was conducted in TTL and as usuall, all the attandance of all FYP 2 student is compulsory. The briefing was by  Miss Pusparini Dewi Abd. Aziz.

           DATE: 6TH SEPTEMBER 2017
           VENUE: TTL 2
           TIME: 3PM - 5PM


In this briefing, the FYP committees have been brief us about:

HOW TO WRITE A STRONG THESIS STATEMENT....
  • understand the academic writing task.
  • Familiar with the different kinds of thesis statements.
  • Formulate a research question.
  • Formulate a tentative thesis statement.
  • Examine a contradiction.
  • Write a thesis statement as a complex sentences and, 
  • Test the thesis statement by considering the following questions.


Sunday, 3 September 2017

WEEK 5 (FYP 2)


WEEK 5


      Activity: PIR Motion Sensor (Experiment 2)


Assalamualaikum...

      As shown as today, is the week fifth i'm gonna try to explain some experiment about the PIR Motion Sensor (HC-SR501). 
All experiment that I do were related with my Final Year Project which is DEVELOPMENT OF HOME AUTOMATION SYSTEM USING ANDROID WITH MOBILE APPLICATION.


WHAT IS A PIR MOTION SENSOR

      A PIR sensor is one that detect movement in a limited range and normally around 7 feet for the cheaper sensor like I used for this project HAHAHAHA. This sensor sense movement by detecting patches of infrared radiation in front of it. 

    PIR sensor are more complicated than many of the other sensors because there are multiple variables that affect the sensors input and output. The IR sensor itself is housed in a hermetically sealed metal can to improve noise, temperature, humidity immunity. There are small, inexpensive, low-power, easy to use and don't wear out. 

     There is a body made of IR-trans-massive material (typically coated silicon since that is very easy to come by) that protects the sensing element. Behind the body are the two balanced sensors. This small thing are normally referred to as PIR "Passive Infrared" or "IR Motion" sensor.


HOW IT WORK..

When a warm body like human or animal passes by, meaning that for the animal not for the small one okay... it first intercepts one half of the sensor, then it will causes a positive differential change between the two halves. The reverse happens when the warm body leaves the sensing area whereby the sensor generates a negative diff. change.So...this is what will happen on the PIR sensor....
For now..already know the basic knowledge of these kinds of sensor...


REQUIRED MATERIALS:
  • Arduino Uno
  • Breadboard (for this experiment)
  • PIR Motion Sensor (HC-SR501)
  • LED
  • Buzzer (also can be added)
  • Amount of jumper wires 


Circuit Diagram (Based on Proteus Software) and the Codes (Arduino) just email me....azlina.aminah@yahoo.com


☺☺☺☺☺☺☺☺


 PART 1


PART 2


If you guys like my projects and if there any addition or any comment, please LIKE my videos so that i understand they are helpful and keep going for new projects :)

Here on YouTube Channel also..

Good Luck, Have Fun!!  ;D;D;D;D;D


Saturday, 26 August 2017

WEEK 4 (FYP 2)


WEEK 4


     Activity: Control the Light (Experiment 1)


Assalamualaikum...

      Hello guys...for this week I gonna show some experiment and try to explain with briefly and this is the first experiment which is about to control the lamps as home appliance.
All experiment that I do were related with my Final Year Project which is DEVELOPMENT OF HOME AUTOMATION SYSTEM USING ANDROID WITH MOBILE APPLICATION.

PICTURES PROJECT


         Circuit Picture (Arduino control light)               4-Channel Relay (On/Off detected from Apps)

Android Application (Selection)


CIRCUIT DIAGRAM

As shown as below is the circuit diagram via the Fritzing Software as example here the home appliance that should be is the lamps but here I replace it with the DC motor. I also do this circuit diagram using Proteus Software. So, it should be no problem..


SCHEMATIC DIAGRAM

The schematic diagram as shown as below...


CODES FROM ARDUINO (e.g.)


Continue with my short video below....I explain about this project for experiment 1 that I do...Don't forget to watch it.....;D;D;D;D;D


Sunday, 20 August 2017

WEEK 3 (FYP 2)


WEEK 3

        Activity: 1st FYP 2 Briefing 

       Today is the 3rd week for this FYP 2. Normally, the 1st briefing is on week 1. Because of the some problem on arrange the time table on FYP calendar. 

It's okay ya...Now let's get focus on this week. The briefing was conducted in TTL 2 and the attendance to all FYP 2 students is compulsory. The speaker is by Dr Siti Marwangi Mohamad Maharum and with assistance(staff) to key-in the attendance. 

           DATE: 18TH AUGUST 2017
           VENUE: TTL 2
           TIME: 3PM - 5PM


     In this briefing, the FYP committees have briefed us about:


  • Code of the Subject FYP must be correct and student should be register the project title for minor amendment before week 8.
  • Assessment that need to be cover for FYP 2 which is final report (logbook/blog), presentation, and project proposal.
  • FYP 2 should be continues after the proposal report with do the result&analysis, discussions, and conclusion of overall project.
  • FYP 2 activities along this semester.


Saturday, 12 August 2017

WEEK 2 (FYP 2)


WEEK 2


         Activity: Development of Home Automation System (HAS)... What? 


BENEFITS IN DEVELOP HOME AUTOMATION SYSTEM

In recent year, wireless systems like WiFi have become more and more common in-home networking. Also in home and building automation systems, the use of wireless technologies gives several advantages that could not be achieved using a weird network only. Even though it become famous thru this this but using Bluetooth Module also can make the system is more easier thru its pros and cons. There are many of advantages of home automation systems such as;

a)      Reduced installation costs:
First and foremost, installation costs are significantly reduced since no cabling is necessary. Wired solutions require cabling, where material as well as the professional laying of cables (e.g. into walls) is expensive.
b)     System scalability and easy extension:
Deploying a wireless network is especially advantageous when, due to new or changed requirements, extension of the network is necessary. In contrast to wired installations, in which cabling extension is tedious. This makes wireless installations a seminal investment.
c)      Aesthetics benefits:
Apart from covering a larger area, this attribute helps to full aesthetics requirements as well. Examples include representative buildings with all-glass architecture and historical buildings where design or conservatory reasons do not allow laying of cables.
d)     Integration of mobile devices:

With wireless networks, associating mobile devices such as PDAs and Smartphones with the automation system becomes possible location is no longer crucial for a connection (as long as the device is in reach of the network). For all these reasons, wireless technology is not only an attractive choice in renovation and refurbishment, but also for new installation.


source info: sensicomfort.com

Continue with my short video below.. i will also explain and talking about this project benefits..Don't forget to watch it....;D;D;D;D;D


Monday, 12 June 2017

WEEK 16 (FYP 1)


WEEK 16

       Activity: FYP1 PRESENTATION ON WEEK 15


PRESENTATION DAY

  • Date: 7th June 2017
  • Time: 2PM - 5.30PM
  • Venue: Gemilang Hall, Unikl BMI
All of the candidates of Final Year Project 1 were having the Project Proposal Presentation and have been assessed by the given assessors. Before that, all the candidates need to follow the procedures that given then can start the presentation. Around 30 minutes early, the candidates do all the setting setup things to give the best performance...Below are assessors for my Project Proposal Presentation.


After I done the presentation about "HOME AUTOMATION SYSTEM (HAS) USING ANDROID FOR APPLICATION"..overall the presentation are going well both of the slide presentation and performance. But, there is some error that I need to redo again. The advises from my assessors which is the objective must be same with the conclusion for the overall project..for my explanation of the running project are very well and can be understood.


THANK YOU TO MY BOTH ASSESSORS ESPECIALLY, TO MY SUPERVISOR SIR SYAMSUL ADLAN....☺☺☺☺☺☺☺☺